Alvarez Painting LLC specializes in meeting the vision of homeowners. They know how to prepare and paint surfaces like wood, brick, and concrete.
They also understand how to protect carpeting and other furnishings from splatter during painting. They can even help you choose the right colors for your space.
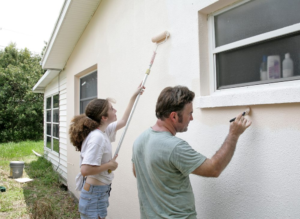
They use basic equipment that you can find at any home improvement store, including rollers, trays, and step ladders.
Wall stenciling is a great way to add color or pattern to your walls. It’s also fairly easy and can be done in several ways. However, there are a few tips and tricks to remember to ensure you get the most out of your stenciling project.
First, make sure you’re using the right type of paint. You’ll want to use a flat matte paint for best results. This type of paint tends to hold the shape of your stencil better and won’t bleed under it like glossy paint can. Additionally, it’s important to make sure you’re using a high-quality stencil brush or roller. If you’re using a standard paintbrush, apply the paint in a light dabbing motion. For rollers, try a foam one rather than a nap roller.
Next, be sure to secure your stencil with tape. That will help keep it from moving while you paint and prevent the corners from becoming “gunked up” with excess paint (which will make it more difficult to stencil). Finally, try bending it at the corner if you’re using a large stencil and have difficulty getting it into tight spots or around curves. You can also pin it into place with cardboard or a drop cloth to help.
When stenciling, it’s important to work quickly. If you slow down too much, you’ll have more paint than your wall space and may have splotches or an uneven look. Fortunately, most stencils will have a center line printed to help you stay straight as you paint. You can also clip on a level occasionally to ensure your stencil stays even as you move it down the wall.
After you’ve finished a section of the wall, give it a few minutes to dry before moving on. You don’t have to wait until it’s completely dry, but the paint should be semi-dry enough not to smear when you apply the next stencil. Continue lining up your stencil with the registration marks you’ve made until you’ve completed the entire wall. Then, remove the tape to reveal your beautiful new wall!
The classic checkerboard pattern—staggered squares in two contrasting colors—is enjoying a retro revival. You’ll see it on runways and in the stores, a design trend trickling down into home decor, including furniture, flooring, and wallpaper. This is the perfect time to embrace this timeless look, says Tannehill.
While you may associate checkerboard with modern and minimalist styles, it’s also a versatile option that works well in more classic and traditional homes. For example, it can add a touch of drama to a living room or bedroom and looks especially good in a monochromatic color palette. You can even use a diagonal version of the pattern to create an even more dynamic effect.
Achieving a checkered effect in your house is easy. Start with a base color—typically white or a light neutral—then use painter’s tape to create vertical and horizontal stripes. Next, paint every other stripe with your desired color. You’ll want to wait about four hours between painting each coat. If you’re feeling adventurous, try using a darker color for the center squares where the horizontal and vertical stripes meet.
Another technique that’s becoming more popular is a harlequin-inspired pattern, which can be created by using different-sized diamond shapes and alternately painting them with the same or a different color. It’s a great way to add a touch of whimsy to your home without investing much time or money.
While floor tiles remain the most common use of a checkered pattern, the design is also gaining popularity on soft furnishings like curtains, rugs, and upholstered furniture. Jones says this is a good way to introduce the pattern without committing to a full tile installation.
Letter stencils allow homeowners to create decorative lettering for their walls, doors, windows, and more. They can be used with both paint and sprays. Stenciling offers several advantages over freehand lettering, such as consistency and repeated repeating of a design. It is also easy to clean up mistakes with stencils. Stenciling is a popular way to make interior walls more personal and unique.
The process of making letter stencils involves a few steps. First, the stencil pattern must be created on a suitable material such as paper, vinyl, plastic, or metal. That can be done using stenciling software or freehand drawing. Once the stencil is ready, it can be cut out using a cutter machine. After the stencil has been cut, it is prepared to be placed on the surface to be decorated. The paint can then be applied using a brush, sponge, or spray can. The paint must be completely dry before removing the stencil and washing it.
Various stencils are available, from simple alphabet lettering to intricate designs and patterns. Choosing the right stencil depends on the size and surface to be covered and the type of paint that will be used. Plastic stencils are a popular option because they are flexible and can be cleaned quickly. These are ideal for use on curved surfaces. They can also be re-used for different projects.
Alternatively, you can purchase a laser-cut stencil kit. These kits are easy to use and come with various letters and designs. You can choose a light stencil to match your existing wall color or go with a dark pattern to make it stand out. It is important to place the stencil carefully and precisely, as moving it once it has been glued to the surface is difficult.
You can also turn any printed lettering into a stencil by layering it with painter’s tape and wax paper. That is a great way to make personalized signs or decorate a room without spending much money on a new painting.
Introducing texture is one of the best ways to add dynamic visual appeal to your walls. It’s a relatively easy painting technique that doesn’t require much artistic prowess. Choose a paint color you love and use a sponge to apply it to the wall. You can apply a thick layer to create a bold look or a thin layer for a subtle effect. Just rinse the sponge often to avoid adding excess paint to the wall.
Texture can also be added to paints by incorporating different substances into the mixture to create a rough surface. That is called impasto, and it was a popular technique used by artists such as Vincent Van Gogh. Alternatively, texture can be created by using different brush strokes or varying the angle at which the paint is applied to the surface.
There are many ways to add texture to walls, and experimenting is the best way to find a style that suits you and your home. Some popular residential painting techniques for achieving textures include sponging, color wash, and rag rolling.
Sponge painting is a simple, stylish, and effective method for creating texture on your walls. It can be applied over a base coat of any color, although a darker shade will help the texture to stand out. You can use a synthetic sponge for an even texture or a natural sea sponge for an uneven finish. Just be careful not to press too hard when applying, as it can lead to rigid lines in the texture.
Another simple way to achieve a textured wall is by using a drywall compound. You’ll need to water it down slightly to have the consistency of pancake batter. Then, you can use a crow’s foot texture brush to splatter the wet mud on your walls.
Another easy way to add texture to your walls is by doing a “color wash.” You use a color mixed with glaze to create a smooth or even paint application. Many people like this approach because it’s a great way to add color without overwhelming your wall with too much pattern or detail.